
After Action Report #2 - Operation Dead Man's Hand

AFTER ACTION REPORT #2 - Operation Dead Man's Hand

In this series I join forces with my Opponents in order to try and present play-by-play Battle Reports from both players' perspectives simultaneously.
 
Disclaimer! Please note that the game you're about to read about was played prior to the N4 Fireteam update of March 2022.
 

The Second Time Around

Thank you everyone who've given comments on the first After Action Report article (Operation Unrelenting Facade); your support and interest means a lot to me! I'm eager to see where future pieces of this series will take us!
 
Recently my buddy GtotheM contacted me and volunteered himself to not only playing with me, but to also co-writing a Battle Report from our game for the blog! I didn't have a preference for the Mission this time around, so my friend picked Countermeasures - my favorite! Due to the physical distance between us, we ended up playing the game on Tabletop Simulator; let's hope the digital platform transforms well into a Battle Report!

The Table: Space Station Cargo by Whyrocknodie

I was originally introduced to this map when I was attending the Remote Access League's Human Edge Team Tournament, where it served as the stage for games of Safe Area. I enjoyed the map greatly; it not only packs nice visuals and tells a story, but it also offers a good variety of long firelines, tight spaces, Special Terrain areas (in this case, the Zero-G of the space!) and flanking opportunities, so we ended up using it in our last spring's domestic TTS league as a map for Countermeasures! When it came the time to select a table for this Battle Report, I thought it would be a good idea to use a map that both of us were already familiar with, and one that we'd also found to be rather balanced to play on!

The Mission: Countermeasures

Grotnib: From where I stand, games of Countermeasures tend to be great fun from start to finish! The Mission throws a great list building challenge at you, and much like a game of cards, you must remain aware of the (Classified) cards that have already been dealt, and the ones that are yet to come out! As I've already written in a previous article, I also think that Ramah Taskforce is particularly well equipped to deal with Countermeasures as a whole!
GtotheM: Now a more seasoned player might be surprised that I chose the Countermeasures Mission, especially since I was playing USAriadna which has limited access to certain Specialists, but as a former Haqqislam and Hassassin Bahram player I simply like this Mission a lot. As such even though I could have chosen a tactically better Mission for my chosen Faction, I decided to err on the side of fun.

Ramah Taskforce List - "For Your Eyes Only"

This list is a modification of the list I wrote for my first List Building Article. GtotheM had told me he'd be commanding USAriadna (a Faction he's been getting into of late) in this battle, so I adjusted the list to account for my Opponent's light Infowar capability - I knew I'd in all likelyhood be facing just a single Wardriver Hacker after all!
My First Battle Group is spearheaded by a five member Fireteam Core of mostly Ghulams. Yara Haddad will lead the offensive with her AP Marksman Rifle, while the Ghulam NCO stands ready to deploy Smoke to cover the advance of my troops when neccessary. When it comes to Classifieds, the team includes a Hacker, a Doctor, a Foward Observer and a Medium Infantry Character with Multispectral Visor L2, so they can accomplish a whole heap of Objectives by themselves!

The rest of the of the Group is made up of a Warcor (a 3 point ARO piece), Carmen & Bâtard (a cheap, fast and durable Character melee menace), a Hortlak Janissary Chain of Command (MSV bearing Heavy Infantry Veteran Troop), a Mukhtar Hacker (Forward Deploying, tough and deadly Hacker/Veteran Troop with D-Charges) and a Hakim with his trusty Nasmat A2 helper (a WIP 15 Medium Infantry Doctor who can split his attention into two places, thanks to his robotic companion).

The Second Combat Group was built to include fire support elements and a couple stray Specialists. The Shihab and Shaytaniyah Remotes will provide both direct and indirect fire where needed, the Rafiq can dash forward to extend my Hacking Area and compelete Forward Observer Classifieds should the opportunity arise, and the Najjarun Engineer will be there to fix any of my robotic units with the help of his Nasmat. I was torn between picking the Monstrucker and upgrading the Warcor to a Fanous or taking the Najjarun, but in the end I stuck with the higher WIP Specialist for a better chance to complete Test Run! Lastly my Lieutenant would be the trusty Zhayedan HMG - he should be able to provide excellent covering fire with his heavy weapon, and having the LT and the NCO in different Order Pools will also give me some nice flexibility when it came to spending his Special Order. The Zhayedan is even a Veteran Medium Infantry, should things come down to that...

All in all I was feeling very comfortable about the list and the matchup. I was packing some excellent firepower, truly great Classified completing potential, good maneuverability, and even a somewhat dangerous Hacking presence! USAriadna shouldn't be able to compete with my list in the Infowar or Classified hunting departments, so as long as didn't let myself get overwhelmed by early attacks and/or fire superiority, I should be good to go!
 
Since the game was played before the N4 Fireteam Update, my list has Yara join the Fireteam Core, and the Zhayedan be my Lieutenant. Had the update dropped prior to the battle, I could have simply switched the two around and everything would have been fine - or rather better than fine!

The USAriadna List - "Countermeasures vs Grotnib's RTF"

The list I used for this game is the first Countermeasures list I have ever written for USAriadna. So far my experience playing with this Faction (on TTS) has been rather sporadic, and as such I have played only a handful of USAriadna games before. Compared to my so-called go to factions in N4 (Hassassins, Yu Jing and Morats), USAriadna seems to play quite differently. However, as Countermeasures is one of my favourite Missions, I knew that I would need Specialists and as such starting the list was easy. 
As a first thing I decided to go with the Grunt Core. These guys are tough as nails with their ARM 3, and they have a good selection of weapons with AP Sniper rifle (+1 Dam) and a Lieutenant option that can fire Speculative Grenades if it has nothing else to do. Also, since all of USAriadna has good PH the B2 Medikit can simply revive unconscious pieces quite easily. This Core would form the defensive backline of my list and hopefully hinder Grotnib's ability to move forward.

After I had the defensive Core sorted, I added a smattering of Specialist like the Sixth Sense Wardriver Hacker, Foxtrot FO, 112 on a Bike (since there is a large Special Terrain "driveway" at the edge of the map) and an Airborne Ranger FO (that has served me well during previous games). The last Specialist choice was the Dozer Engineer with a Total Reaction Traktor Mul in tow. Now so far I have not had that much success with indirect fire in N4, but I have heard good things about utilizing it, so since I was already investing points in three FOs and a Hacker, I thought I might as well go the whole way and also bring the Guided Missiles along!

Next step in the list building were the gunfighters. As a Haqqislam player I know Ramah has access to some nice units, so I decided to go with a sturdy Blackjack with HMG, the ever-heroic Unknown Ranger (this time with the MK12 since RTF in general has lower armor values and there are tight corridors in the map) and Rosie to lead the Grunt Core. For faster action I splurged and got the Maverick with AP Spitfire (as it has Mimetism (-3) for free and he can claim cover in this season's ITS). As a last piece I decided to take a Hardcase since with Decoy it can try and trick Grotnib into thinking that I don't have any (airborne) surprises, and besides a Camouflaged Light Shotgun is a strong piece if you are up against Light Infantry.

The Initiative Roll

Grotnib: I won the roll and had to choose whether to Keep Deployment or the First Turn. I was pretty torn on what do, because I felt rather confident in my ability to keep GtotheM's forces in check for the first turn, and forcing him to come to me would potentially give me more targets to complete Classifieds on... Then again, going first would give me the best potential for an Alpha Strike, as well give me the chance to discard an Objective that would suit my Opponent well. In the end, I decided to take the first turn - there was afterall the (small) chance of GtotheM trying to spam over-Infiltrating Grunts to try and ruin my day, and I didn't want to have to deal with that nonsense!
GtotheM: After losing the Initiative rolloff, I of course made Grotnib deploy his units first. Now I knew from my previous game on this map that the blue side had better positions for AROs so I decided to go with it and hope for the best. Considering that in my experience USAriadna is better at attacking than defending, losing the chance to go first was a direct blow to my battle plan. Especially, since I was counting on either killing Ramah Specialist and/or completing as many Objectives as I could early on.  

Before the Deployment - Blizzards and Turrets

The ITS13 version of Countermeasures incorporates both Blizzards (two Circular Templates worth of Difficult Terrain (Mountain) that are also Saturation Zones), as well as F-13 Turrets (small, Total Reacting Combi Rifle platforms), so we had to start with those!
 
Grotnib: After joking about the space station's broken environmental control systems, I deployed my Blizzards in such a way that they would impede my Opponent as he tries to exit his Deployment Zone from either flank (I knew that USARF didn't have that many models with Terrain (Total)). I placed the F-13 Turret in the strip of space next to my DZ - I was planning to throw an HVT there, and the Turret would hopefully deter any Parachutists trying to make an entrance through this part of the board, as well as slow down any Ariadnans bullrushing the corridor from their side of the table towards the Civilian.
GtotheM: I knew that the tower would be an important ARO place for my Core Fireteamed Sniper, so I was happy that Grotnib didn't place a Blizzard to block the central LoF on the field. As for my Blizzard placements I simply placed them to give maximum speed to the few troops that could benefit from them (the Hardcase and the Foxtrot), and as such one template went into the side room while the other went into near the center line where I intended to hide some HVTs. The turret was sent floating near to the exterior door of the space station on the right. This was the easiest way for Ramah to attack my flank, so I clearly needed more safeguards there. 

The Deployment

Grotnib: GtotheM wisely made me set up first and on the worse side of the table, but luckily I had a pretty good idea about where everything was about to go anyway!

The Fireteam Core took up positions near my centre, ready to rotate to where ever they'd be needed. Yara and the Hacker were deployed moderately aggressively in order to deter the most enthusiastic enemy pieces, while the NCO was tucked away into a place from which she'd be able to launch her Smoke as needed.

The Shaytaniyah and the Shihab took up positions overlooking long, if narrow, firelanes, and the Najjarun along with his Nasmat were deployed in such a way as to be ready to repair them once they got hit. I also made sure to position my REMs in such a way that when they got knocked unconcious, they'd be safely hidden behind some terrain to prevent their wholesale destruction.

The Rafiq and the Zhayedan HMG took up positions inside the station's corridors, while the Hortlak Janissary found a spot from which to start advancing in any direction near the middle of my DZ. The Warcor put on his space helmet and took advantage of the Saturation Zone inducing Antenna Field outside the space station to try and slow down any attackers coming from that direction.

I used a Command Token to Reserve two model drops, which ended up being the Mukhtar Hacker and Carmen & Bâtard - pieces that ended up deploying on the somewhat weakly held northern flank - here comes the Space Bike!

GtotheM: Now, a wiseman has once said that the Deployment Phase is the most important phase in a game of Infinity and that good Deployment can either win or lose the game. Now, unluckily for me I suck at Deployment! Well okay sometimes I do okay Deployments but sometimes… well let's not go into that… At least not yet (spoilers!).

For the start of my Deployment, I saw that Grotnib had placed two HVTs into/near the cargo hold (as I had foreseen he would) and so I decided to place my Foxtrot there as close to them as I could. To the room behind I placed also the 112 and the Hacker, thinking that the turret and the Maverick (who'd shed Impetuous) with AP Spitfire would be able to keep them safe until my turn.

As for the Fireteam Core, they deployed to the tower at the center of the Deployment Zone. The AP Sniper was standing on the top so she could see the Shihab, Yara (if she came peeking), and the central ARO line. Then I placed the Paramedic prone next to the Sniper and deployed the rest of the Core safely behind the pillar in Prone state.
 
Considering the Unknown Ranger has MSV L1 and good movement capabilities, I deployed him to the left side of my backfield. He would hopefully guard against Parachuting Nahab Specialists and could maybe go for a run at the third HVT if needed. the Dozer Engineer went behind the house and the Traktor Mul on the top of the building. Lastly, I placed the Hardcase (and the Decoy) next to my two HVTs, with the actual hardcase touching the Blizzard zone. There he could try to protect them from wandering Specialist with his Light Shotgun. Finally, the Blackjack went behind some boxes in front of the core ready to move up and wreak havoc with its HMG.

Now, I had of course forgotten that Ramah has Carmen and so when Grotnib placed her on the starting line of the "space fast lane" I started second guessing my Deployment choices...

Top of Turn 1 (RTF's First Active Turn)

Grotnib: My Opponent chooses to remove two Orders from my second Combat Group by spending a Command Token at the start of the battle, which I take to mean that he's more worried about my firepower than my potential for Classified Card hunting - suits me!

We draw the first three Classified Cards, and after I discard HVT Kidnapping (I don't think I'm going to get to any of the HVT's this turn), we end up with Test Run, Datascan and Sabotage. My first Order of the game is spent on the Shihab, who moves to fire at the Core Fireteamed Grunt Sniper (who shoots back), before returning to it's original position. This really is a roll that I (almost) can't lose; if I knock out the Grunt, then great, I've taken out a dangerous ARO piece, and if the Shihab gets gunned down, then great, I've got an easy target for the Testrun Classified! The (unlikely) failure state for me is that neither of us take any wounds and I have to keep spending Orders to force the issue, while the (extremely unlikely) catastrophic failure state is that the Shihab ends up taking a Critical Hit and another hit (or two Critical Hits) and then failing three saves, but if that's something one has to feel fearful for, better stay at home to begin with! I'm rolling four dice on 5s against two dice on 14s due to the extreme range, and look and behold - the Total Reaction Bot gets hit, goes unconcious and the second Order of the game is spent on the Najjarun, who using his trusty Nasmat fixes my Remote right back up, netting me my first Classified Card - success!
GtotheM: I decide to take two Orders from Grotnib's Second Pool. Firstly, this is more efficient (at least based on math), since reducing a pool of 5 to 3 means that I strip 40% of his Orders in that group in comparison to just striping 22% I could have gotten by taking them from the Group 1 Pool. Secondly, there are good gunfighters and weapons in Group 2, so I might be able to limit the damage to my troops if I strip Orders down from it. My idea is that as long as I have enough Orders and Specialists alive at the start of my second turn I can make a comeback.

When Grotnib decides to activate the Shihab and contest my AP Sniper I'm at first happy that my 2x14 vs 4x5 is a good ARO opportunity to take out a strong piece. However, at the same time this can also provide a good opportunity for him to complete a Classified card. My Core Sniper gets the job done and shoots the Remote unconscious, but sadly Grotnib then just fixes it and gets Testrun done. Well at least this has taken two Orders from his secondary Pool!

Grotnib: I feel that my best chance of scoring some kills and/or more Cards is going to lie in advancing in the cargo hold area or outside the space station, as these areas give me the best chance to close in on GtotheM's troops without exposing myself to too much danger. The first Combat Group gets going when Carmen (who dissapointingly rolled Grenades on Booty) makes a sweeping 9'' + 4'' Move-Move to position herself on an attack vector. I'm also hoping to get Bâtard close enough to the Camouflage Marker lurking in the cargo hold in order to Sensor it through the wall, but the werewolf's lack of Terrain (Total) means that he gets quickly left behind by his mistress. As the second Order on the deadly tandem still doesn't get Bâtard to where he needs to be, Carmen just lobs Smoke to blind the enemy F-13 Turret and to impair the Maverick's aim; I'll have to try something else moving forward!
GtotheM: After a brief moment of though Grotnib starts moving Carmen&Bâtard on the outside of the space station. As the deadly pair moves closer to my Foxtrot and the side of my Deployment Zone I start sweating. Somehow, I totally forgot that RTF has access to Carmen and now I can see that my right side is kind of open to an Alpha Strike even though I placed my Turret to protect it. Luckily, Grotnib decides to just throw Smoke to stop the Turret from shooting. If my Opponent moves Carmen a bit carelessly my Maverick might get a shot using his MSV L1, I just need to be careful that Carmen isn't in Chainrifle range when I take the shot since this would make it possible for her to shoot back even through the Smoke!
 
Grotnib: Time for plan B! The (probable) Foxtrot has to go if I'm going to get any more Classifieds done, so the Mukhtar Hacker moves up and Discovers the (nonresponsive) Camouflage Marker - which to no one's surpise turns out to be a Foxtrot Forward Observer! I felt that under the current circumstances I couldn't afford to waste any time just moving on the first activation and then Discover-Shooting on the next Order, as had I failed the Discover I would have been able to abort the attack an activation earlier by playing the interaction the way I did! The second Order sees me carefully position the supersoldier to take a shot at the Ariadnan without drawing Line of Fire through the Blizzard situated between the models, nor getting shot by the rest of GtotheM's overwatch pieces. I have to take this fight with both of our models out of cover, and while I'm rolling three dice on 13s with the Mukhtar's Rifle against the Foxtrot's one dice on a 13 with the Flash Pulse, and the supersoldier has excellent BTS of 6 in the case she gets hit, this is a roll that can quite easily go wrong and stop my advance in it's tracks - hats off to my Opponent for forcing such a risky play on me! Luckily that Mukhtar remorselessly guns down her advesary - I would have loved for the Foxtrot to drop unconcious to be an easy Datascan target, but I really can't complain!
GtotheM: Instead of simply continuing Carmen's rush, Grotnib decides to move the Mukhtar Hacker forward. I fear that this will mean that I will lose my Foxtrot, but he won't go down without a fight! The first activation of the Mukhtar is a Move and a Discover. This is a bit strange since it would be safer to just take another Order to try Discover + Shoot. If the RTF Specialist would somehow fail the Discover, that would royally screw future plans for the Mukhtar, so I decide to do nothing with my Camouflaged piece. However, unsurprisingly the Mukhtar succeeds which means that next order will likely lead to the Foxtrot's death. Instead of shooting, I decide to try the higher target number Flash Pulse since even though the Mukhtar has an extremely high BTS, the Flashpulse will force two saves and if the Mukhtar is Stunned it will stop her doing further things during this turn, while killing the Mukhtar with a single ARO is practically impossible or at least highly unlikely. Alas, after a few digital dicerolls the Foxtrot is completely dead.

Grotnib: The next activation of the Mukhtar sees her skirt around a container to get to the one I've selected as my target for Sabotage (I was thinking of another approach vector when picking the piece of terrain to go for, so now I was forced to take a bit of a walk), and GtotheM Dodges with his bikers in order to try and reposition them. I try to Datascan the Maverick, but WIP 14 fails me this time around. I use the next Order to move to my Sabotage target, all the while holding my breath - it's looking awfully close on whether I'm entering the Wardriver's Hacking Area, and I really can't afford to start digitally duelling her with so few Orders remaining in my main pool! Luckily were just out (8,1''!), and as the enemy bikers Reset to avoid Datascan/Spotlight, I detonate the supersoldier's D-Charges and secure my second Classidied of the turn!
GtotheM: I am not entirely sure what Classifieds Grotnib is aiming for with the Mukhtar, but since she can try Datascaning the Maverick the next Orders of the Mukhtar lead to weird scramble of Dodge/Reset AROs from me. Unluckily the Mukhtar manages to avoid the Wardriver's ARO range and after a detonated box Grotnib scores the second Classified of the turn. On good side there is only one Irregular and one Regular Order left in my Opponent's main Pool, so maybe I can have most of my Specialists left when my turn comes!

Grotnib: With an Order and an Irregular Order left in the first Combat Group, I'm at bit of a loss on what to do. Trying to complete Datascan with WIP 14 against WIP 13 Resets isn't going to be reliable with only two tries at it, and going for it will also leave both my attacking pieces very much flapping in the wind. In the end I choose violence, and Carmen drives into melee with the enemy F-13 Turret. I dare GtotheM to fire at me with his Maverick, which would allow me to return fire with my Chainrifle (+1B), but he wisely chooses against such an action. Carmen double Critical Hits the helpless Turret with her Heavy Pistol (+1B)'s melee mode, and now I've got just one Order left!

I eye the gap between the Maverick and the wall, and lament the fact that Carmen probably can't fit through there - if she could, I'd be able to attack the Maverick, the Motorized 112 and the Wardriver on the same go! In the end I choose to spend the Order on Carmen anyway - atleast I should be able to take out the Maverick and end up in an annoying position! I declare Move as my first Short Skill, and start measuring where I can go... And to my joy, the biker can just barely blast by her opposing number to open the door and return to a position from which to potentially Chainrifle all the three enemy models nearby! After a careful consideration, GtotheM chooses to Dodge with the Wardriver and shoot me with the Maverick's Pistol and the 112's Light Shotgun (using Hit Mode). The enemy Hacker really is the one I want dead here, but there's a world where I try to shoot her with my Heavy Pistol, and she either beats my rolls or passes her save(s), while Carmen goes down to the enemy fire in return... I'm not willing to let that happen - so I double Chainrifle everybody, confident that this way I'll atleast take out something! The dice fall very favorably for me, as the Wardriver fails her Dodge and dies outright, and both the enemy bikers get knocked unconcious - oh yes! Carmen takes a wound for her trouble, and I elect to have her go Dogged and instantly die, just so as to deny my Opponent a pontential target for Classified Card hunting!
GtotheM: Well… Apparently Carmen needs only a few Orders to demolish my right side! With one Order the biker drives into the CC with my poor Turret and destroys it easily. I decide not to fire with the Maverick since this would give Carmen an opportunity to fire back. Next the biker screeches past the Maverick almost touching him and blasts all three of my figures with her Chainrifle. The logic behind my ARO declarations is that I try baiting Heavy Pistol shots from Carmen, since I know he wants specifically kill the Dodging Wardriver, and thus I elect to shoot with Maverick and the 112 who both have Mimetism. Sadly, this gamble doesn’t pay off and my units die in a hail of shrapnel from the Chainrifle!
 
Grotnib: I spend the Lieutenant Order on my Ghulam NCO to reposition the Ghulam Fireteam to a more defensive formation, with Yara taking up positions so that she can challenge any of GtotheM's pieces trying to make a dash for my Mukhtar and/or the middle HVT.
 
Grotnib: I've got one last Order left in the second Combat Group, but I'm fairly happy about the position of my defensive pieces, so I just elect to put the Rafiq into Suppressive Fire. All in all, I'm really happy how the turn played out - taking out my Opponent's only Hacker was huge, and I was also able put a serious dent on his Order Pool. I only lament the failed unopposed WIP14 roll that could have scored me the third Classified of the turn, but I'm in no position to complain!

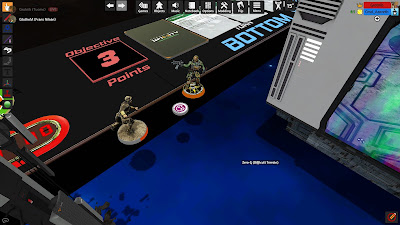
Bottom of Turn 1 (USARF's First Active Turn)

The turn starts with two fresh Classified Cards (Follow Up and Capture) being drawn. GtotheM also elects to discard Datascan and it gets replaced with Extreme Prejudice.
 
GtotheM: After the slaughter of all my lovely Specialists by my Ramah Taskforce Mentor (spoilers…), I feel a bit disheartened, but after a brief sigh I steel myself and look at what Objectives the Deck is prepared to give me. Now, the game is not at all lost: if I can just get a few points on the board and maybe inflict some damage on my Opponent, I should still be able to claw myself back. Sadly, the Classified Deck is not doing me any favors! Follow Up is technically possible with my Grunts or with the Blackjack. Extreme Prejudice is also possible, but difficult since there are no easy to get to unconscious targets available, and lastly completing Capture just isn't viable.

After looking at the board I decide that the easiest way to start this comeback is to start moving my Core Fireteam forwards. They are Medium Infantry, and thus they can theoretically score two of the three current Objectives. Thus, the first obstacle is to shoot the Shihab away with my Core Fireteamed Sniper. Considering the math of 3 dice with BS 14 vs 4 dice on 5s, I feel that this should be easy enough to do. The first roll leads to only one hit, which the Shihab saves, while during the second activation the poor Sniper misses totally and gets shot unconscious breaking the Fireteam...
Grotnib: My Opponent begins the proceedings by activating his Fireteam Core and having a go at my Shihab using his Grunt Sniper. GtotheM is rolling 3 dice on 14s against my 4 dice on 5s, which is does feel pretty lobsided. Then again, I do have a raw 20% Critical Hit chance here, and there's always the slight possibility of me passing my saves! If (and when) the Total Reaction Remote gets knocked out, I can in all the likelyhood just repair it right back up the next turn! GtotheM gets real unlucky here though, because he only causes a single hit on the first activation, which my robotic guardian saves, and even though I don't roll a Critical on the second time around either, the poor Grunt misses all his shots and gets knocked unconcious by a stray HMG bullet while making his way down the ladder!

GtotheM: Well clearly, I have somehow angered ALEPH and now my TTS dice rolls are crap! But luckily I have a Paramedic in the Team and the Grunts have good PH. So after reforming the Fireteam I decide to try healing the poor Grunt. One of the Paramedic's shots hit, but instead of shooting the healing dart safely to the body of the trooper, the Paramedic clearly hits an eye, since instead of getting back up, the Sniper just dies. Well, this whole thing has now eaten three of my rather limited Orders, thus the only thing I can do is repositon the Grunts so that they can maybe move further in the future... Luckily, I still have the Blackjack in my other Group so maybe I can do some damage and maybe try completing Follow Up with him instead.
Grotnib: Well, this really isn't the Grunt Sniper's day! Not only did he lose a very in his favor fight against my Shihab and fell unconcious, but now GtotheM's Paramedic fails to heal him and instead puts him out of his misery! Atleast the poor soldier is spared the ridicule of his comrades back at the barracks... With no other models available to him in his second Order Pool since I've knocked the 112 out, my Opponent soldiers on and repositions the Fireteam to enter the cargo area the next turn. Unfortunately GtotheM not only had to reform the squad after the Sniper went down, but Rosie also outstrips her comrades and another Command Token has to be spent to bring everyone back to the Fireteam in the end.

GtotheM: Now to get the Blackjack in the right position I need to be careful. The Mukhtar Hacker can easily tie the unit into knots by asking if I want to get hacked or shot. So, if I want to get closer to the HVT I have to move on the outside of the cargo area. Also since I plan to spring my Paratrooper surprise the next turn, I definitely have to kill the Rafiq since I don’t want to deal with any Rifle + Light Shotgun shenanigans. Thus, my targets are clear, and the first Order sees the big B shoot down the nasty Shihab and then the next activation sees him gun down the Rafiq. The bad thing is that the Total Reaction Bot only takes two wounds (and thus is still repairable), but if Grotnib decides to fix the Remote then that will at least take an Order.
Grotnib: Here comes the Blackjack! GtotheM brazengly advances forward with his Heavy Infantryman, and the my two REMs on that flank are the first to fall. To be totally honest, I'm quite happy to see my Opponent spend Orders engaging expendable targets, and it's becoming evident that not only is my Mukhtar going to survive this turn, the Blackjack won't be able to retreat to safety either - come to papa...

GtotheM: After the two Remotes are down, the next target on the list is Yara. Now as a mainly Haqqislam player I have no misconceptions about the strength of Yara in a Core Fireteam, but still considering my units, the Blackjack is most likely the best unit to try and take this strong gunfighter down with, since even though I am at BS 10 against her (due to my 0 rangeband and her cover), I am still throwing more dice. Also killing her would hinder Gotnib's ability to complete Classifieds requiring Medium Infantry or Multispectral Visors. However, instead of cutting the head of this Yara serpent, my Black Jack takes a wound and after choosing to fail Guts, I decide to put him in Suppressive Fire to maybe hinder attacks in the next Ramah turn.
Grotnib: Not being content to go after the light weights, the Blackjack engages Yara with GtotheM's dwindling Orders. This fight is a whole lot more risky for the Ariadnan, as due to range and cover he's rolling 4 dice on 10s against my 2 dice on 16s! I'm willing to lose Yara if neccessary to blunt my Opponents attack, but she comes through for me and puts a wound on the Blackjack! My opponent elects to fail his Guts Check to break Line of Fire, before entering Suppressive Fire with his now Battle Ravaged behemoth.
 
GtotheM: The last thing I do is to reposition the UKR for the future turns. Now with my turn ending, I do a quick assessment on it. Instead of doing missions and getting points, I managed to lose my most important ARO piece. Luckily, I did manage to reposition my units for a better push for the future turns, but clearly Grotnib and his Ramah troops are in the driver's seat at the moment. Well, the dice fall where the dice fall, so the only thing one can do is to push forward and considering the priorities I outlined for myself at the beginning of my turn, I have at least succeeded in some of them.
Grotnib: My Opponent uses the Unknown Ranger's Tactical Awareness Order to Cautious Move to a better position to launch an attack from the next turn. That wasn't too bad!

Top of Turn 2 (RTF's Second Active Turn)

Grotnib: To start things off, I choose to discard Capture, and it gets replaced with Mapping. I know this turn is mostly going to be about the Mukhtar ravaging what's left of GtotheM's Fireteam Core, and then trying to hunt a couple Classified Cards under her name while at it. I spend a Command Token to shift the Hakim and his Nasmat A2 to the second Combat Group, as he's my best bet on completing Follow Up this turn, and the Group 1 Orders are going to be a rather valuable currency this turn with everything the Mukhtar needs to do!
GtotheM: This game the Deck seems to be heavily favoring the RTF strike team, as clearly my Opponent needs another easy Objective to complete. Oh well it's just a game, and sometimes the random nature just gives lemons to some and apples to others. As Grotnib moves a secret unit to another group I start sweating as most of Ramah Hidden Deployers and Parachutists are bad news.

Grotnib: The first Order of my active turn goes into the Fireteam Core, with Yara taking the lead to peek out to see the Blackjack. I get a bit carried away here; I should have first used the Lieutenant Order on the NCO to blind the enemy combatant with Smoke, but I let my excitement get the best of me, and rush straight into shooting stuff! The resulting face to face roll favors Yara (four dice on 13s vs three dice on 9s), but there's no reason not to further improve the odds... Luckily I don't get punished here, and the Mutafiq officer takes out the Ariadnan.
GtotheM:
I wonder why on earth Grotnib gives me a fair face to face roll and decides to peek out first with Yara, but hey who am I to argue! Blackjacks BS is a respectable 9 vs 13 but it could have easily been 3 vs 13 so I roll away. Sadly, the big HI goes down (in a blaze of glory or at least of coca-cola)!

Grotnib: Next the Muhktar Hacker moves carefully to draw a Line of Fire to the Grunt Paramedic caught in the open. The enemy trooper Dodges, and while my supersoldier wins the face to face roll, the Grunt passes her save and elects to fail her Guts Check in order to break LoF, although she has to stand up to do so.
GtotheM: The best part in playing USARF is that almost every unit has a decent armor value and a good PH stat (though I wouldn’t say no to more T2 weapons either). Thus, even if your units are left in the open for eeeevil Mukhtars to shoot at, you can usually dodge with a high PH and even if you fail, you are likely to pass the armor roll (50/50 in many cases). Thus, when Grotnib tries to kill my Paramedic in the open, she just takes the hit and moves to relative safety. Clearly only the Paramedic is allowed to kill other Grunts!

Grotnib: With the Grunt Paramedic standing out in the open, Yara peeks around the corner and takes her out cleanly - 4 dice on 19s with AP Ammunion will do that! I can imagine the poor Ariadnan getting hit by the Mukhtar's Rifle, then stumbling up in a daze or panic, only to be brutally gunned down from another direction!
GtotheM:
Apparently the whole RTF is out to get my poor Paramedic, as next  it's Yara who decides to take a shot at her. Sadly, instead of only one shot she hits with a full burst of 4, and this time the trusty armor vest gives up the ghost (with the Paramedic). Oh well, at least this took two Orders from the RTF's Pool!
 
Grotnib: Next on the menu is the Grunt Forward Observer, who I engange with the Mukhtar. GtotheM elects to try and Flashpulse me to stop the attack, but the brave Grunt can't stand up to the supersoldier, and he too gets killed.
GtotheM:
The wholesale slaughter of my poor Grunts continues, but since the Paramedic is already dead, this time the Mukhtar sets her beady eyes on the Forward Observer. I try to snap an image of this warcrime machine, but the Rifle bullet goes through the camera into the eye my trooper. Well, I guess I won't need that FO anymore, but you can be sure that Ramah will get the bill for that camera! Sadly, this makes further movement for the Mukhtar quite easy.

Grotnib: With the way forward clear, the Mukhtar Hacker advances on the remnants of GtotheM's once proud Fireteam, and I maneuver the supersoldier so as to see the last Grunt, and barely not see Rosie. This means that I can theoretically Direct Template both of them, which forces a Dodge from my Opponent. This allows me to roll an unopposed Spotlight against Rosie, which succeeds!
GtotheM:
Unsurprisingly the Mukhtar moves to threaten the rest of the Core Team, and the following exchange really shows why the Mukhtar Hacker is such an awesome trooper. Moving carefully Grotnib is able to threaten me with the Rifle, the Light Shotgun and with Hacking, and as I don't want to lose the rest of my Grunts, I decide to Dodge - which of course allows Grotnib to throw a free Spotlight against Rosie, and after getting Targeted, the Missiles start raining down and soon another brave Ariadnan rests in pieces...

Grotnib: Rosie is the last credible threat to the Mukhtar left on that flank, so I spend an Order on the Shaytaniyah to fire a Guided Missile at her. A faint sound of an explosion in the distance marks the death of the Ariadnan hero.

Grotnib: With only a couple of Orders left in my primary Combat Group, I elect to dismiss the last Grunt as a low level threat (keep that one in mind, as it'll be important later!), and instead of gunning her down, I have my Mukhtar try and complete the Mapping Classified. Should she succeed on the first try, I can use the last Order from the pool to perform Coup de Grace on the nearby 112 and bag me another Objective Point! Unfortunately I fail two WIP 14 rolls in a row, and disapointingly the supersoldier fails to score me any further points. Atleast the Grunt fails to wound the Mukhtar with her Rifle!
GtotheM:
Well at least my Lieutenant is still alive as weirdly Grotnib decides to let the last Grunt live and elects to try to complete Mapping. Apparently the Mukhtar is still in a killing mood, since she fails two 70% rolls. My Grunt tries to shoot her, but I guess the Haqqislam symphatizers have changed all the real USARF bullets to training ammo, and Mukhtar passes her save.

Grotnib: While the battle of attrition is very much going my way, I haven't been able to complete any Classified Cards this turn - it's time to bring in the Hakim to try and change that! I use Parachutist to enter the table from the area of space to the right of my Opponent's Deployment Zone. The first actual Order spent sees the Nasmat A2 get into base to base with the unconcious Maverick (thanks to Terrain (Total)!), and perform Coup de Grace to score Extreme Prejudice. The last Order of the pool gets the Hakim to within 8'' of the USAriadnan HVT positioned on this flank even while moving Prone, so as to avoid enemy fire next turn, but I fail the roll to complete Follow Up, even despite WIP 15! Unopposed high Willpower rolls seem to be my cryptonite this game...
GtotheM:
When Grotnib reaches to the unknown paratrooper to deploy I feel my whole body clench and prepare myself for the Nahab, but instead of a genetically altered killer, a Nasmat and a Hakim appear on the table. To be fair, I have never used or faced a Hakim before. Apparently, they are no joke though, since with a few Orders the unit goes and scores Extreme Prejudice and gets into a commanding position. Luckily for me Grotnib fails another WIP roll - one with a 75% success chance this time!

Bottom of Turn 2 (USARF's Second Active Turn)

Rescue gets drawn to the row of Classified Cards, but it's discarded by GtotheM and replaced by HVT: Identity Check.

GtotheM: Desparation mode initiated… Luckily there's more than one Player in this party that can deploy paratroopers! I pull out my Airborne Ranger and laugh as I manage to completely surprise Grotnib. He has made numerous notes of about my two Foxtrots in the middle of the field during the game, even though my Orders have been visible the whole time. Sadly I have only two Orders for the brave paratrooper, but two Orders should be enough for Mapping if I can just get a few good rolls. After dealing with the surprise, Grotnib decides to ARO with the Warcor's Stun Pistol, even though the Flash Pulse is clearly the better option here - it seems my surprise has unhinged the unmatched mathematical brain of my Opponent (at least for a while). Still, the Warcor hits and soon the Ranger is Stunned, and as the Stunned State gives a -3 modifier to all rolls, I of course fail my Mapping WIP roll by just one measly point. (I get to point out that a roll of 11 would have been an easy success for the Mukhtar though.)
Grotnib: GtotheM Starts the turn by bringing in an Airborne Ranger, which takes me by surprise! This turn I realise how poorly I've researched my Opponent's Faction before the game - I did not realise that the Hardcases have Decoy, which meant that I had miscounted the number of models GtotheM had deployed... What's even worse, I could have deducted the presence of the Decoy (and thus the fact the there was an Airborne Ranger or Van Zant still missing from play) by carefully counting my Opponent's Orders at the beginning of his first turn (as the Decoy doesn't provide an Order!), but by failing to do so, I allowed myself to get ambushed! Luckily the Parachuting enemy is in the Combat Group that only had a single Regular Order in it at the start of the turn, and thus the Ariadnan is forced to enter the table next to my Warcor if he wants to have a chance at completing the Mapping Classified. I make another mistake by electing to ARO with the Stun Pistol instead of the Flash Pulse, because I'm thinking that the Warcor is BS 11 - while he is in fact, BS 9, which means that my target number with the Stun Pistol was 9 and the Flashpulse's would have been 10 (not to mention DMG 13 instead of 11 on the Stun Ammo)! Luckily this doesn't end up mattering though, as I hit anyway and the Ranger gets Stunned. GtotheM uses the last (=only) Regular Order from the Combat Group to try and complete Mapping, but the -3 modifier on the roll caused by the Stunned State costs my Opponent an Objective Point when he ends up rolling an 11! The Warcor Dodges in an attempt to tie up the Ranger for my next turn to prevent any potential AROs, but he fails at the task.

GtotheM: Next it is time to move the Unknown Ranger forward and kill that annoying Hakim. I decide to make run for it, and with a few clever Moves and successful Dodges, the only true superhero aims carefully at the enemy paratrooper and makes him sleep the true sleep. The bad thing is that while doing this the Unkown Ranger gets Spotlighted, but surely nothing bad can come of this… right? Right?!? With grim determination I roll a successful WIP20 on myself so as not to flip the virtual table and instead I just relinquish the turn back to my friend instead. :) ;) 
Grotnib: GtotheM uses what Orders he has in the larger Order Pool to make an attack run on my forward elements using the Unknown Ranger. A couple of Move + (succesful) Dodges gets the Ariadnan hero safely into a position from which to attack my poor Hakim, who gets gunned down. This provokes a Spotlight from the Mukhtar, which ends up succeeding.


Grotnib: The Unkown Ranger spends the last Regular Order to attack the Mukhtar Hacker at a close range. As the supersoldier is still not wounded, I'm not afraid of the Chaincolt, and thus I return fire with the Light Shotgun's Hit Mode looking for a 19 thanks to my Opponent's piece being Targeted. The Ariadnan wins the face the face roll anyway and forces me to make several saves, but the Mukhtar passes enough to just take a single wound, and thus the vengeful Haqqislamite is left bloodied, but standing (proning?).
 
Grotnib: GtotheM spends his Lieutenant Order to activate the Grenade Launcher wielding Grunt to launch a Speculative Attack against my Ghulam Core's NCO and Doctor models. I again realise how badly I've prepared to face USARF - I dismissed my Opponent's (now revealed) Lieutenant as a low priority target last turn, when I had her dead to rights! The Ariadnan is looking for a 2 and she Critically Hits the shot, though my both my Ghulams miraculously survive! Ugh...

Top of Turn 3 (RTF's Third Active Turn)

Grotnib: Okay, time to close the show! I elect to keep all the Classified Cards presented to me (Mapping, Follow Up and HVT: Identity Check), as I can complete all of them quite reliably this turn. The only real obstacle I'm facing is the Unknown Ranger. Luckily he's Targeted, so I can call a Guided Missile Strike on him. The bad news is, that with his Dodge (+1''), a succesful Dodge will take him close enough to the Mukhtar to prevent further Template attacks, and the catastrophic failure state of two passed Dodges will allow my Opponent to tie the supersoldier in melee. My plan A is to launch a Guided Missile at the Unknown Ranger, and if the passes the Dodge, I'll switch to taking a shot with my Zhaeydan while he's still out in the open, although I'll be forced to fire through a Blizzard if things come down to that. I won't need to bother though, as while the Unknown Ranger ties the first Guided attack with his Dodge, the second finds it's mark and obliterates the last meaninful piece of enemy resistance!
GtotheM: I feel the pressure as Grotnib starts his turn. My best piece is in Targeted State and even though the Unknown Ranger is quite adept at Dodging, it will still be hard getting the Ariadnan hero to safety. As the first Missile angles in I only tie the hit, so sadly my unit is not able to move. After an extremely brief sigh of relief following the first Missile, I watch in desperation as the Unknown Ranger fails the second dodge and dies. Well, at least I still have my Hardcase with its Decoy protecting my HVT, which means I can hopefully ambush Yara...
 
Grotnib: Next the Mukhtar finally passes her WIP Check to score Mapping, while Yara leads her Fireteam to within Zone of Control of an enemy HVT to get me Follow Up! The fearless intelligence Officer then rounds the corner and performs HVT: Identitity Check - being a Character Medium Infantry with Multispectral Visor L2 does tick quite a few boxes when it comes to completing Classifieds afterall! This move sees her take a Light Shotgun Template from the Hardcase defending the HVT, but I don't mind - losing Yara doesn't really matter if (and when) I pass my WIP roll, and in the end she survives thanks to her BTS 3 and Bioimmunity anyway. I even had the Ghulam Doctor follow behind her to heal her if the worst came to pass!
GtotheM:
  As Grotnib starts moving the Ghulam Fireteam closer to my HVTs I tense up. Finally, my Hardcase (one of my favorite profiles in USARF) can spring the surprise and maybe even kill that annoying MSV L2 trooper and thus deny the HVT: Identity Check from Grotnib! Now, this won't of course save the game, but as Yara shot down my Blackjack it is definitely time for some sweet revenge. Unsurprisingly, Yara comes in trying to perform the Identity Check while my Hardcase just starts blasting with his Shotgun, but sadly though this is all for naught and she passes the Light Shotgun save and completes the Card.
 
Grotnib: Yara wraps things up by gunning down the Harcase with her Heavy Pistol (+1B) (while she again shrugs off the Shotgun blast), and finally taking out the enemy Lieutenant by shooting her in the back. I use my last Order from the secondary Combat Group to repair the Shihab via the Najjarun's Nasmat just to conserve some additional Victory Points.
GtotheM: As a last act before handing me the turn, Yara guns down the Hardcase for good measure and even shoots my Lieutenant in the back of the head. All this even though I am already in Retreat!, but I guess getting shot by Shotguns can make one slightly angry!

The Bottom of Turn 3 (USARF's Third Active Turn)

GtotheM: As Grotnib gives me the turn there is literally nothing I can do. However, I do congratulate myself since I did try to play as best as I could, and even though I'm only at the beginning of my journey with USARF, I'm already having a lot of fun with this Sectorial. Also for me the fun in Infinity game never comes out only from winning or losing, but from the game itself and Grotnib is a great adversary since I always feel that I learn something when I play against him. So, for now my USARF force slinks back to lick its wounds and they will return sooner or later! 
Grotnib: My Opponent is in Retreat! and he has no Command Tokens nor Religious/Courageous/Veteran troops left - the game is over. It's time to put 'em on safe and let 'em hang; the day belongs to Ramah Taskforce!

The End Score: Ramah Taskforce 8 - 0 USAriadna Ranger Force


Post Game Thoughts and MVPs

Grotnib: Well, that was some rough going for USARF! I feel that as a Mission, Countermeasures favors Ramah over USAriadna, which meant that after I was able to pull off a great first turn, it was almost impossible for my Opponent to get back into the game!

I have to complement GtotheM's list and his deployment - the first turn felt quite stressful to me, and I had take several not-that-great-even-though-favorable fights in order to execute my attacks! Luck was definately on my side here, as there really wasn't a crucial roll that I lost, which propelled me into a commanding attrition and Objective Point lead. From there on out it was just about keeping the pressure up and trying to not make any crucial mistakes!

The one big mistake I made was how I prepared for the game. While I modified the list with the opposition in mind, and scouted out the map in advance, I failed to properly research the USARF force on the ARMY - I should have taken note of the fact that the Faction does have access to Decoy (a skill that's really important to keeps tabs on!), and I should also have familiarized myself with GtotheM's Lieutenant choices. Luckily neither the surprise arrival of the Airborne Ranger nor the fact that I let my opponent's LT live on my second active turn ended up mattering a whole lot, but those are unforgivable mistakes that could have cost the game in an alternative reality! I'll be sure to take this lesson to heart and do better the next time around...

The list itself did great - I had atleast two models available to me that could complete any of the Classifieds the Deck threw at me, and this showed! I got a bit unlucky with a few of the WIP rolls, but I really can't complain - I'd rather fail at a roll that results in a Classified Card not getting scored, than one that ends up costing me a critical model!

All in all my Opponent played quite well, and his list shows great promise, but the hill he had to climb today was just too steep - you'll get me next time GtotheM!
 
GtotheM: Well… what can I say. I believe I made some bad decisions during the Deployment that left a "Carmen-sized" hole into my backline which basically got most of my Specialists killed and took critical Orders from my Pool. Other than that, I think my list was quite good for Countermeasures and maybe if I had gotten to keep Initiative instead of choosing the table side, I maybe could have even won the match. Based on my limited experience USARF really wants to be an aggressive force instead of a reactive one, and thus in a Mission that is already hard for them, like Countermeasures, being aggressive would have likely served me better. Anyway, it was still definitely a fun game and I think I learned a lot.

RTF MVP Award:
Mukhtar Active Response Unit Hacker - this game really showcased what a versatile and capable model she is! The Mukhtar Hacker was able prove her worth as a versatile completer of Classified Cards, as a fast and deadly gunfighter, as a dangerous Hacker and as a surprisingly durable combatant - what else can you ask for from a 31 point model?

USARP MVP Award: Hardcase, 2nd Irregular FRONTIERSMEN Battalion - Now this might seem a strange one to nominate, but through the match Grotnib really thought that I had two Foxtrots next to my HVTs. This miscalculation basically made my Airborne Ranger play viable and made it possible for me to try getting the Mapping Classified. Thus, always remember to calculate the models and the Orders from the Combat Groups. Now if the Ranger only had been Van Zant…

More Than Cards Have Been Re-Shuffled!

Since me and GtotheM played this game, the Infinity Meta has been shaken to it's very core by the much anticipated N4 Fireteam Update. I'm very excited to learn more about what that'll mean for RTF going forward, and I'm hoping to relay additional After Action Reports to you in the future. I feel that I'll probably need to re-examine the format though, since preparing an article such as this one takes a ton of work, which in turn limits the amount of reports I can publish... Please let me know what you'd like to see going forward - more reports such as this one, or maybe something totally different!

Until the next time - I wish you the very best in leading the Swift and Deadly Spear of the Haqqislamite Army to Victory!

Comments

Popular posts from this blog

The Good Guys Wear Orange - A Compilation of Articles

THE GOOD GUYS WEAR ORANGE - A Compilation of Articles This page is meant to compile all the blog's articles written (or planned!) so far, and thus help readers find what they're looking for!   The Unit Focus Series In the Unit Focus series I take a look at the different units that make up the Ramah Taskforce, and try to answer why, not if, you should include them in your lists. Light Infantry Ghulam Infantry Naffatûn Najjarun Engineers ¹ Monstuckers ¹ Warcors, War Correspondents ³ Khawarijs Nahab Aeromobile Team Namurr Special Operative Group Mukhtar Active Response Unit Husam Operative Leila Sharif ² Medical Specialist Rahman Rouhani ³ Tarik Mansuri, Khawarij Amir Wild Bill, Legendary Gunslinger ⁵ Beasthunters (ITS Bike Recon) Motorized Bounty Hunters   Medium Infantry Zhayedan Intervention Troops Hakims, Special Medical Assistance Team Yara Haddad, Intel Ops Mutafawiq Officer ²   Heavy Infatry Janissaries Al Fasid Regiment Hortlak Janissaries   TAGS Maghariba Guard ⁴ Sha

The Court of the Scorpion Queen - Maghariba Guards & Shakushs in RTF

THE COURT OF THE SCORPION QUEEN - Maghariba Guards & Shakushs in RTF In the Unit Focus series I take a look at the different units that make up the Ramah Taskforce, and try to answer why, not if, you should include them in your lists.   (Disclaimer! As of writing of this article, there is no Corvus Belli released model for the Shakush Light Armored Unit, and thus I've painted a Gecko Squadron model to serve as a replacement, as I feel it incampsulates the essence of this Light TAG quite well.) While it is highly unorthodox to field a TAG - especially the largest TAG in the game - in a rapid reaction force that's mostly made up of light units, there are times when even Ramah Taskforce players get to go big (rather than go home)! While you propably came here for the supersoldiers and other elite operatives , sometimes the situation (or one's mood) requires busting out the biggest guns and the heaviest armor; so let's talk about the two Tactical Armored Gear units

In Service of Others - Warcors and Rahman Rouhani in RTF

IN SERVICE OF OTHERS - Warcors and Rahman Rouhani in RTF In the Unit Focus series I take a look at the different units that make up the Ramah Taskforce, and try to answer why, not if, you should include them in your lists.   (Disclaimer! I unfortunately don't own the Defiance set from Corvus Belli, so I lack the actual model for Rahman Rouhani. I use my SMG Hakim as a proxy, because he to me seems the closest fit considering Rouhani's weapons, stats and abilities.)   Ramah Taskforce is the very tip of the spear when it comes to the armed forces of Haqqislam. They have the best equipment, all the logistic support they can hope for, and most importantly, the most elite soldiers of the nation at their disposal. When it comes to building an ITS list with RTF however, there are times when units chosen are defined not by what they are, but rather what they're not. Let's look at two support elements of the sectorial; Warcors, the War Correspondents and the Medical Speciali